THE BATTLE FOR BERIMOND
When the war between the Bears and the Lions breaks out again, each player level 30 and above is invited to join the war. The game will assign you a side to play for, and if you are in an alliance, all members of that alliance will be playing for the same side. In Berimond, you have a military camp rather than a castle. Unfortunately, like Everwinter, Burning Sands, and Fire Peaks, you will not be given a choice as to where your Camp will be located, and alliance members are rarely close enough together to be able to offer support in the case of an attack.
Your camp receives resources at regular intervals. You can neither increase nor decrease how much you receive, it is based on the balance of power between the two sides. To increase your storage capacity for resources, build new supply storehouses. Unlike in other kingdoms where decorations boost production, decorations in Berimond increase the attack strength of your troops.
The goal of Berimond is to capture the enemy Capital, but this can only be done by first destroying all the enemy Towers along the way. It takes many thousands of attacks on a single Tower for that Tower to be defeated, but when the Tower falls, the Resource Villages attached to it are available for attack. Once a Capital is finally captured, the remaining time in the event is supposed to be a free-for-all, last-man-standing attack on other camps. (I say supposed to be, because I have never seen a Berimond in which a Capital is captured.)
TABLE OF CONTENTS
ENTERING BERIMOND (and general how-to-play)
KEEPING UP WITH YOUR SCORE / RANKING
ENTERING BERIMOND:
You will be given some choice as to how much to spend for your camp. The picture below shows your options.
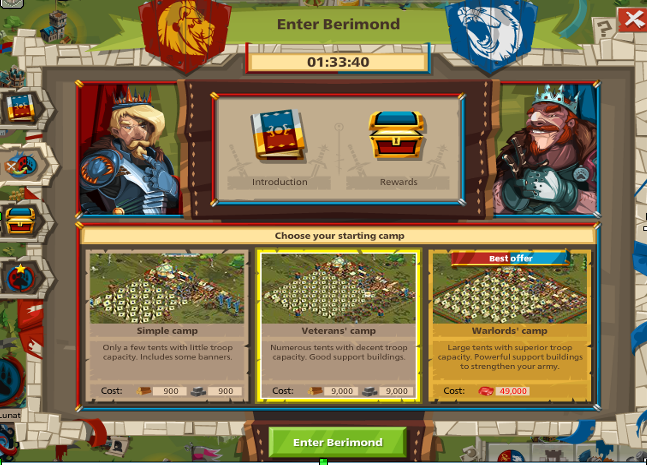
I normally choose the center option – the Veterans Camp, since it is upgraded enough when you get it to leave it pretty much as it is for a short duration Berimond event, but it can be upgraded for a longer event.
My first move upon entering my camp is to start recruiting Auxiliary Troops. These special troops are only available while in Berimond – they will NOT come to your main castle after the event is over. They also do not get injured in battle – they die, so they do not show up in your hospital.
My next move is to build another Supply Storehouse as soon as I have started recruiting – when the Supply Storehouse is completed, the quest item award will include enough materials to be able to make the first upgrade on the Auxiliary Headquarters. Once I receive that award, I start upgrading my Auxiliary Headquarters. Each Auxiliary Headquarters upgrade increases the number of troops the camp can hold.
You can send over troops and tools; you cannot send over any resources from the main worlds, nor can you send any resources from your Berimond camp back to any of your regular castles or outposts.
TIP: I upgrade the Auxiliary Headquarters and the Training Grounds ONLY during any Berimond event lasting less than 3 days. If the event runs longer, then I may do other upgrades, and I definitely build more decorative items. I do, however, build another Supply Storehouse as soon as I have started recruiting – when the Supply Storehouse is completed, the quest item award will include enough materials to be able to make the first upgrade on the Auxiliary Headquarters.
While the recruiting and building are going on, I send over whatever regular troops and tools I want for the event. If you plan to attack other castle lord’s camps, you may want to send over some of your higher level troops. Personally, I only attack the Berimond Towers, so I only send over one low-level troop since I cannot send tools without sending that one troop. I usually send 1,200 scaling ladders, 1,000 battering rams, and 1,200 mantlets plus any special Berimond tools I have. > Remember that any Berimond glory banners in your inventory will NOT be available for attacks on Towers, because only attacking enemy camps wins glory points.
Any regular troops you send over, who are not in the hospital, plus any tools not used will return to your main castle when the event ends. Any troops still in the hospital when Berimond ends will be lost.
As the next picture shows, there are only 2 types of auxiliary troops available for recruiting. Most folks I know who attack only towers prefer to recruit only one type of auxiliary, while those folks who also (or exclusively) attack other camps generally recruit a mixture of ranged and melee troops.
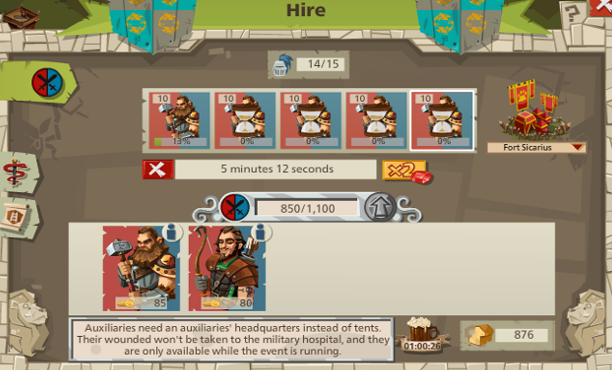
Which troops you recruit will depend on your personal attack preference and on the commander that you use. The auxiliary troops are relatively powerful, and are equally good for offense and defense, so you do not need separate defensive troops. They recruit relatively quickly, but don’t forget, you can hire a feast to speed up recruitment speed – I find this particularly useful when Berimond first starts, as it reduces the time required to be able to start attacking towers, and if I am trying to get in a bunch of “last-minute” attacks at the end of the event. Hiring a feast in Berimond also speeds up recruiting in your Castles for the duration of the feast.
Remember that the choice of troops and tools needs to be based on your Commander, for instance if you have a Commander with a 65% melee power and only a 40% ranged power you do better to use mostly or all melee troops. Also, the more wall and/or gate reduction your Commander can provide, the fewer tools you will need to achieve 100% reduction. Additionally, if your Commander has gems to increase the number of troops in your attacks (whether flank or center) along with a courtyard bonus, the bigger the better of course, all of these will help you to be successful in Berimond just as they do when attacking other castle lords or NPC targets.
TIP: New Berimond camps have protection for the first 24 hours of the event, or until an attack against another Camp or Tower is made. I bookmark my own sides’ Capital as soon as possible after entering Berimond, and then send all my troops there, as Support, while I am off-line. That way, if my camp is attacked while I am off-line, my troops are still safe.
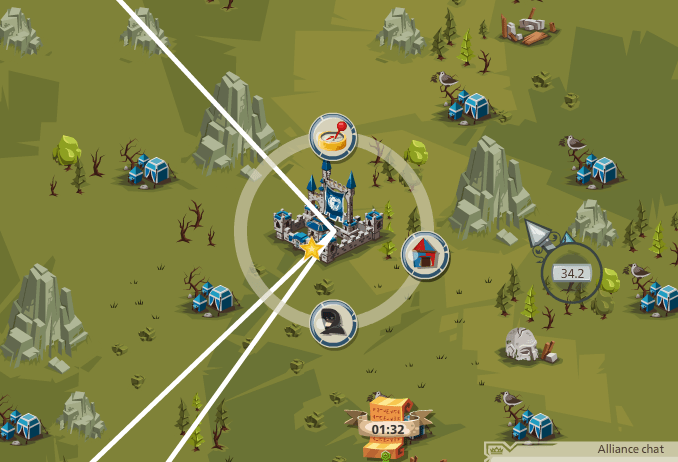
The white lines lead back to the Towers, so to find the Capital, find the tower nearest your camp and just follow the line back to the Capital.
ATTACKING ENEMY CAMPS:
You should need only one spy to get a spy report on most of the camps, and both the spies and troops move more quickly in Beremond than in the regular worlds. There may be a few camps where sending more spies is necessary, but it is not usual for very many camps to have much in the way of City Guards. Guardhouses are available in the construction menu, but few folks seem to build them, especially on the shorter duration Berimond events.
The easiest way to find enemy camps is to open your regular Quest book (lower right of screen) to the Berimond quests page. The first quest listed, “No Mercy”, is a quest to attack enemy camps. Click on the “show me” green arrow for that quest and it will take you to enemy camps.
Attacking camps is pretty much the same as attacking an enemy castle, so you already know how to plan and execute your attack.
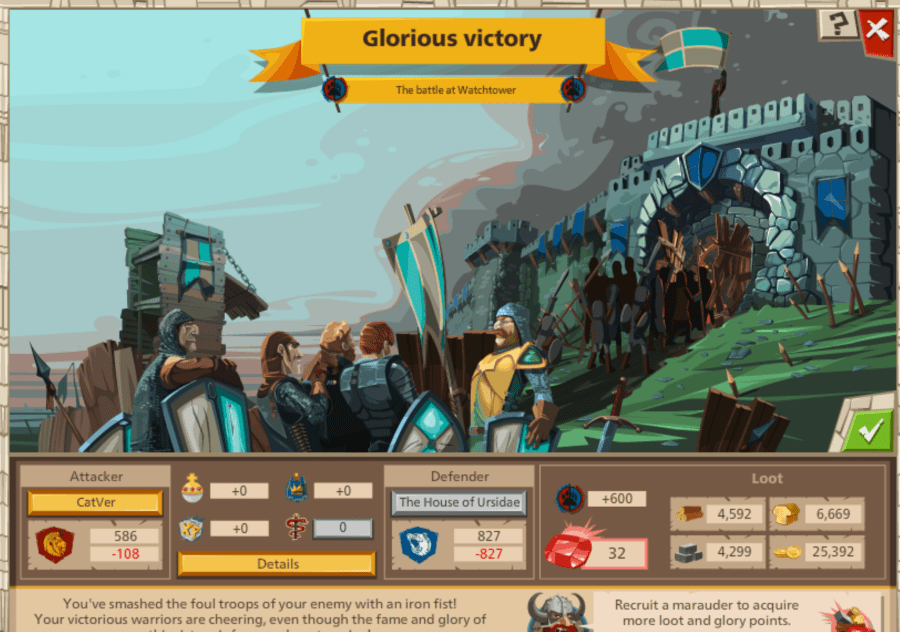
If you want to earn glory points in Berimond, you must attack enemy camps, but you can win the prizes and awards just attacking Towers, because the Titles and prizes/awards are based on Gallantry points, and you do receive those when attacking Towers.
If you are in a hurry to upgrade your camp, but don’t want to attack a camp and maybe lose troops, there are usually quite a few empty camps in Berimond. People enter Berimond and then for whatever reason never continue – they don’t recruit troops, don’t ship troops over – but the camp is there and receiving its periodic shipments of resources. So these can be a source of extra resources. Just remember that a camp can appear to be empty on a spy report because it’s entire army is off attacking a tower or another camp. And something else to note, most people do NOT ship over defensive tools, so few camps have any Wall, Gate, or Moat tools.
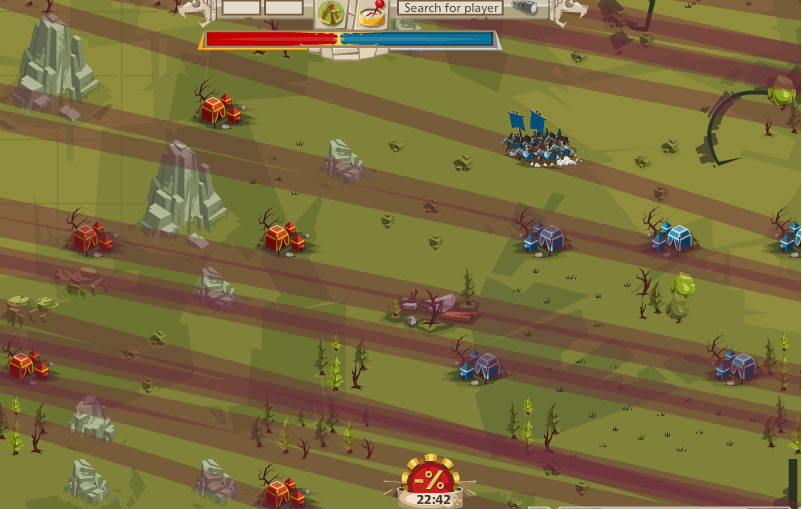
The border between the Lions (Red Camps) and the Bears (Blue Camps) The purple stripes are armies on the move. The horizontal red/blue stripe at the top indicates which side is currently ahead in the contest – when you hover your cursor over it you will see the percentages at that time.
KEEPING UP WITH YOUR SCORE / RANKING:
To see how you are doing, click on the Berimond icon on the lower left side of your screen.
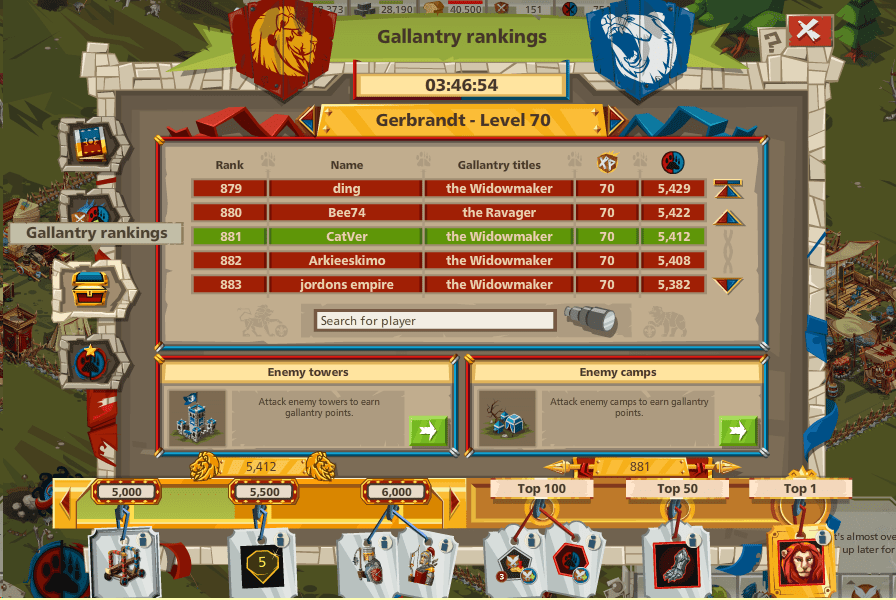
Then click the Treasure chest on the left edge, this will give you the Gallantry rankings. This is also where you can look to see how other players are doing.
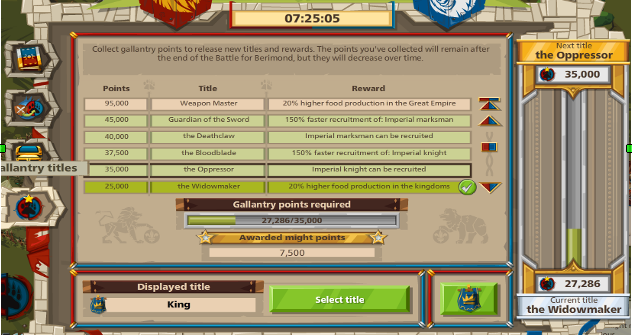
Clicking the Berimond icon on the Left side will bring up the Gallantry titles.
ATTACKING TOWERS:
If you want to spy or attack a Tower, the easiest way to find the first tower that is still undefeated is to:
1) Exit your camp to the Berimond world
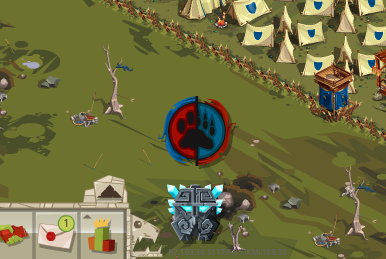
2) Click the 5th icon from the left in the listing under the Chat box (the icon is a round circle with the left half red and the right half blue with a double green arrow on the circle) ![]() 5th icon (says “Go to the Front” when you hover your cursor over it)
5th icon (says “Go to the Front” when you hover your cursor over it)
3). You will now be at the closest undefeated enemy Tower.
As with the enemy camps, you should need fewer spies to provide a spy report on the Towers than you do for attacks against targets in the regular worlds. This can save you a lot of coins over the duration of the event. NOTE: After entering a number of Berimond events, I quit getting spy reports on the Towers, because I found an attack strategy that is sufficiently effective and which is not dependent on the enemies defenses.
If you choose to, you can get a spy report on a tower and set up your attack based on the report. Keep in mind, the tower’s defenses only have tools against the first two waves of attackers, so set up your attacks accordingly.
TIP: If you want to see how other people set up their attacks on towers, send one troop to a tower as support, and you will get a report on the next attack on that tower. Do this repeatedly, and you will get a lot of ideas as to how, and how NOT to set up your attack.
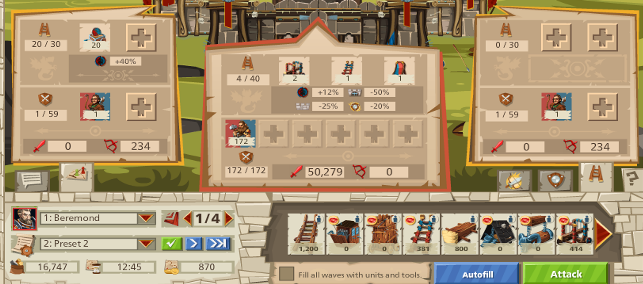
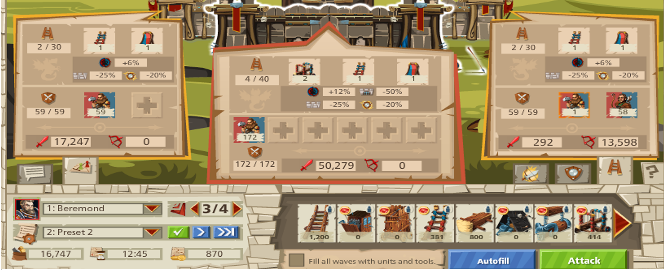
This is how I set up my attacks on Towers in Berimond: (I am showing a 4-wave attack first, as it should apply to most of our alliance members at this time.) Admittedly, this approach tends to produce losses of troops somewhere between 110 and 135 per attack. However, losing more troops is preferable to me over having to use approximately 120 mantlets per attack. Mantlets are expensive in resources, and take a lot of time to produce. Folks I have talked to who have come out consistently in the top 25 in Beremond send out over 150 attacks on towers during a Berimond event. If you have Berimond tools, use them – they reduce the number of tools you need and increase your Galantry points.
FOUR-WAVE ATTACKS (Level 51 and above):
Waves 1 & 2: Tool Burner Waves
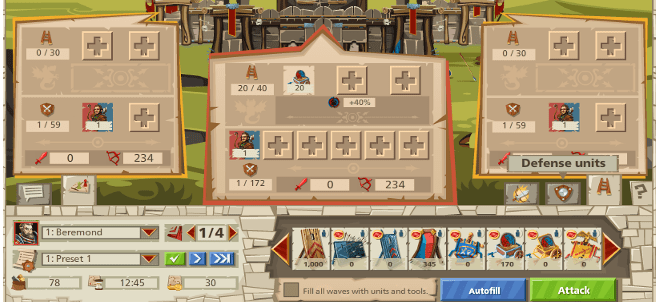
Since no tools are sent on tool-burning waves, I use the empty tool slots for any banners or other gallantry point enhancers that I have. You only need 1 troop per flank.
Waves 3 & 4: attack waves
Waves 3 and 4 are fully filled-out with as many troops as you can stuff into them.
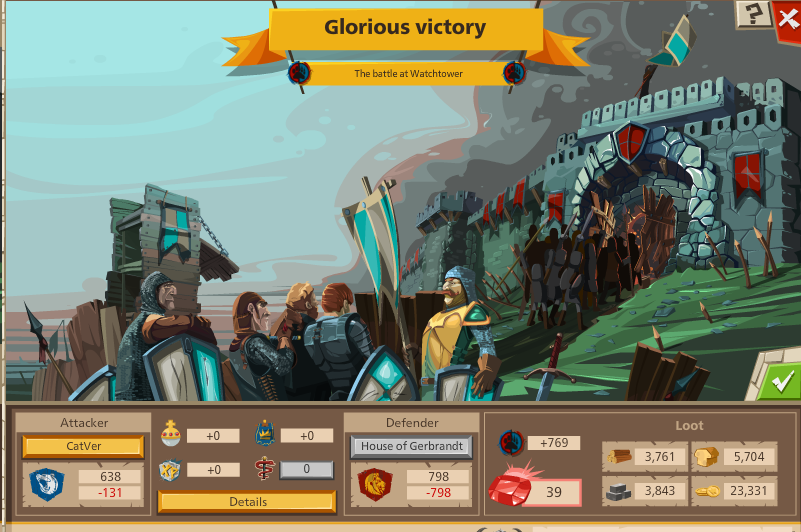
And a WIN!
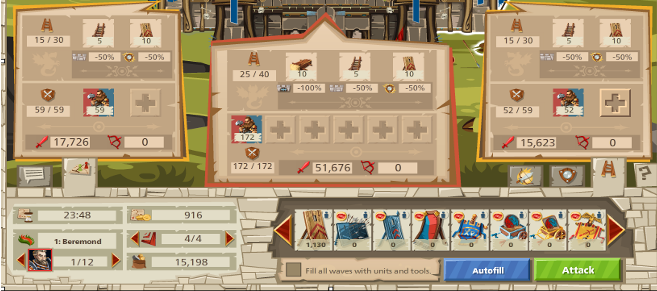
THREE-WAVE ATTACKS:
Three-Wave attacks cannot be done quite the same way. Only Left and Right Flanks can be set up to burn tools, the Center must be filled fully.
1st and 2nd Waves:
For the first two waves, the leaft and right flanks will have only 1 troop each, while the center will be fully loaded with troops.
3rd Wave:
For the 3rd wave, all flanks are fully filled out with troops. [I have 4 waves, but to try this method from the forum and be sure it worked, I only used 3 of my 4 waves.]
And a WIN!